
|

|
HANGING RUGS
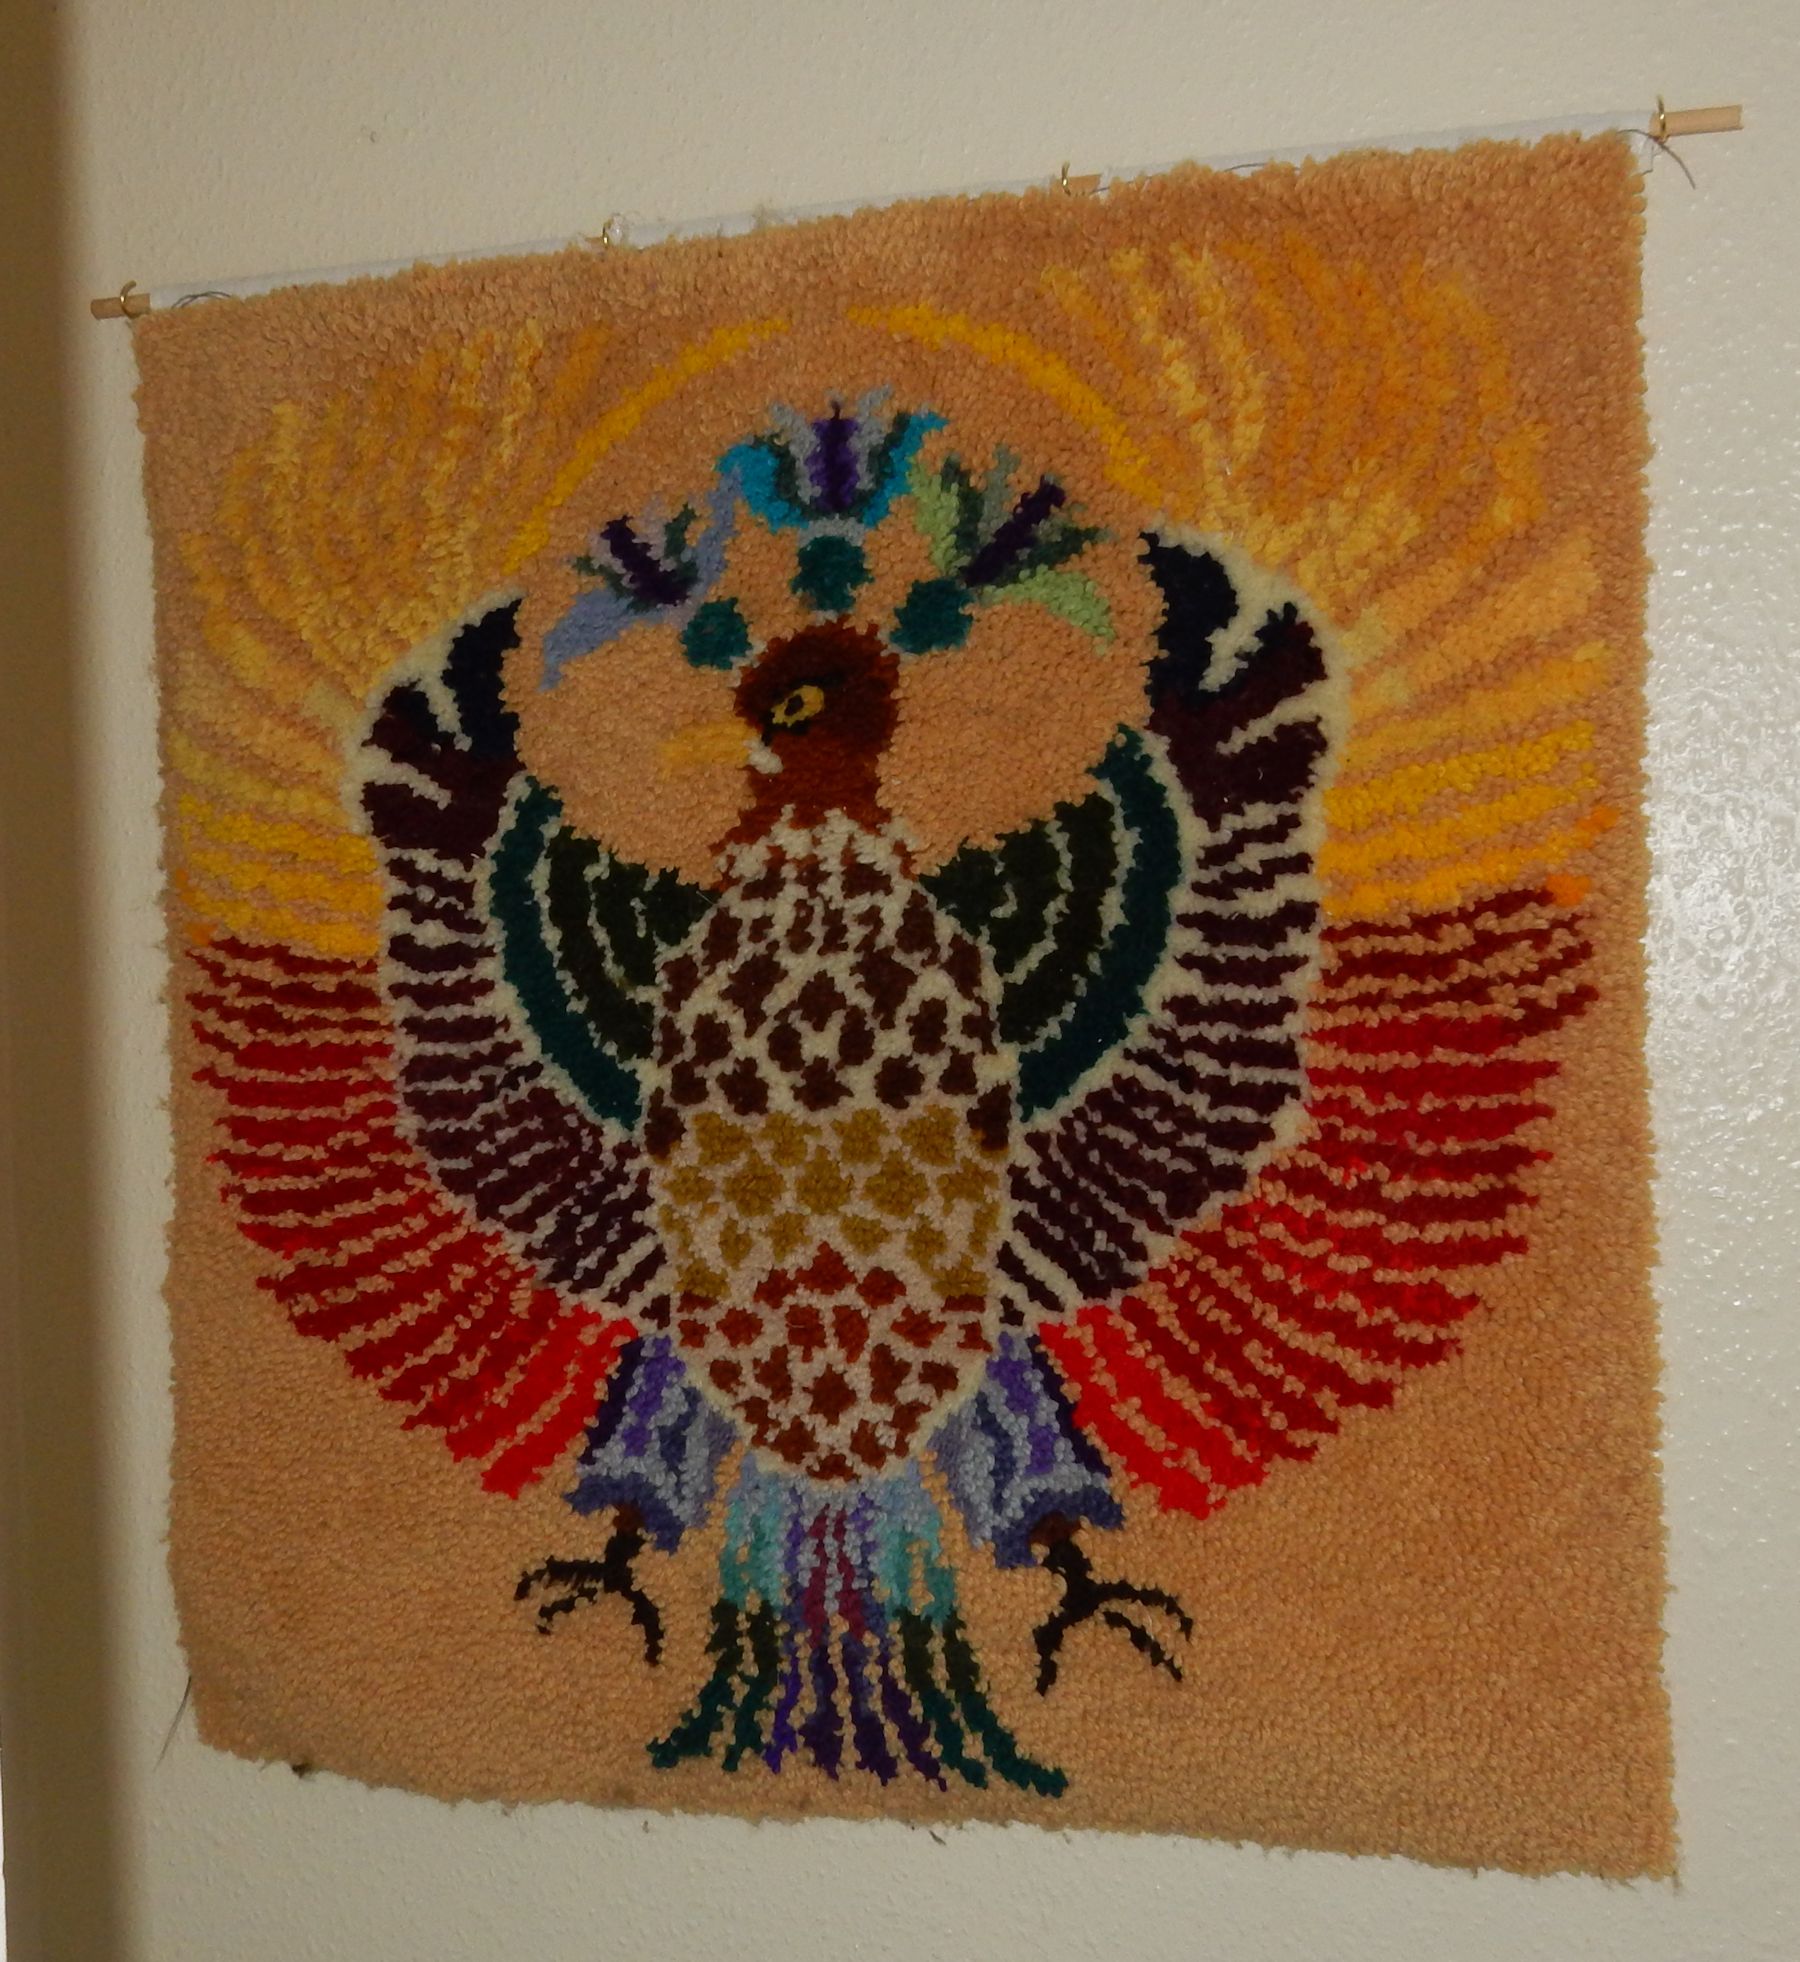
If you love rug-making but run out of floor space and you have rug throws on all the seats, the next step is hanging rugs on the walls! Personally I like the almost medieval feel of wall hangings. My mother thinks of it more like a Bedouin tent. As well as the aesthetics of large textile artworks, rugs make good insulators. At the time of writing I have several rugs to hang on the walls - game birds, tiger head, country cottage, deco peacock, totem bird and my own design peacock.
Readicut used to make something called HangQuick which you clipped together to make the length you needed and fixed to the wall. It had 2 rows of plastic "fingers" that hooked into 2 rows of the rug to hang it. Unfortunately this handy item isn't available any more and is even hard to find on auction websites.
It's possible to make a similar item using a baton of wood with screws or nails spaced along it. Another solution is to use several sets of kitchen utensil hooks (the sort with multiple prongs on a metal backing) though these will not line up perfectly with the holes in the canvas.
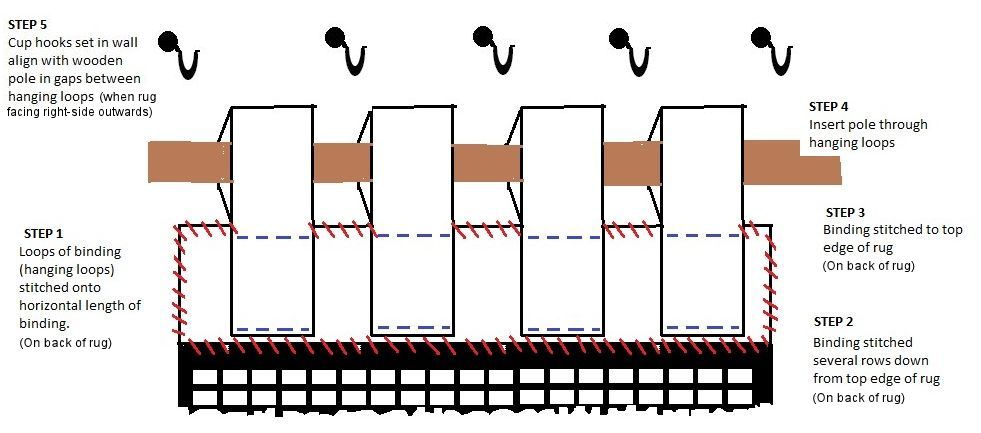
Before HangQuick, you used binding tape and a pole. First you stitched several pieces of folded binding tape into equal-sized loops. You stitched these loops securely, and at evenly spaced intervals, to a length of binding that matched the width of the rug. Then you passed a wooden pole through the loops. To fix it to the wall you needed a series of hooks screwed into the wall and you hooked the pole over these. The number of loops and hooks, and the diameter of the pole, depend on the weight of the rug - you need to distribute it equally.
|
|
|
My local Oxfam had a large amount of 3 inch width curtain-hanging tape which is stronger and wider than the usual rug binding tape. This is what I'm using for the largest rug. The wall hooks are brass cup-hooks spaced at 10 inch intervals. The fiddly bit will be manoeuvring this heavy rug into position so that the pole rests on the cup-hooks.
In all cases I've used plastic Rawlplugs suitable for the type of wall, in my case plaster on brick for load-bearing walls and plaster-board for partition walls. To calculate the number of hanging points I've used the rough formula of 1 hook per 12 inches + 1 extra. That means a hook at each end of the pole and the remaining hooks evenly spaced along the top of the rug to distribute the weight. Otherwise the weight of the rug will (a) bow/break the pole or (b) pull the fixing from the wall. A spirit level will ensure the hooks line up horizontally.
|
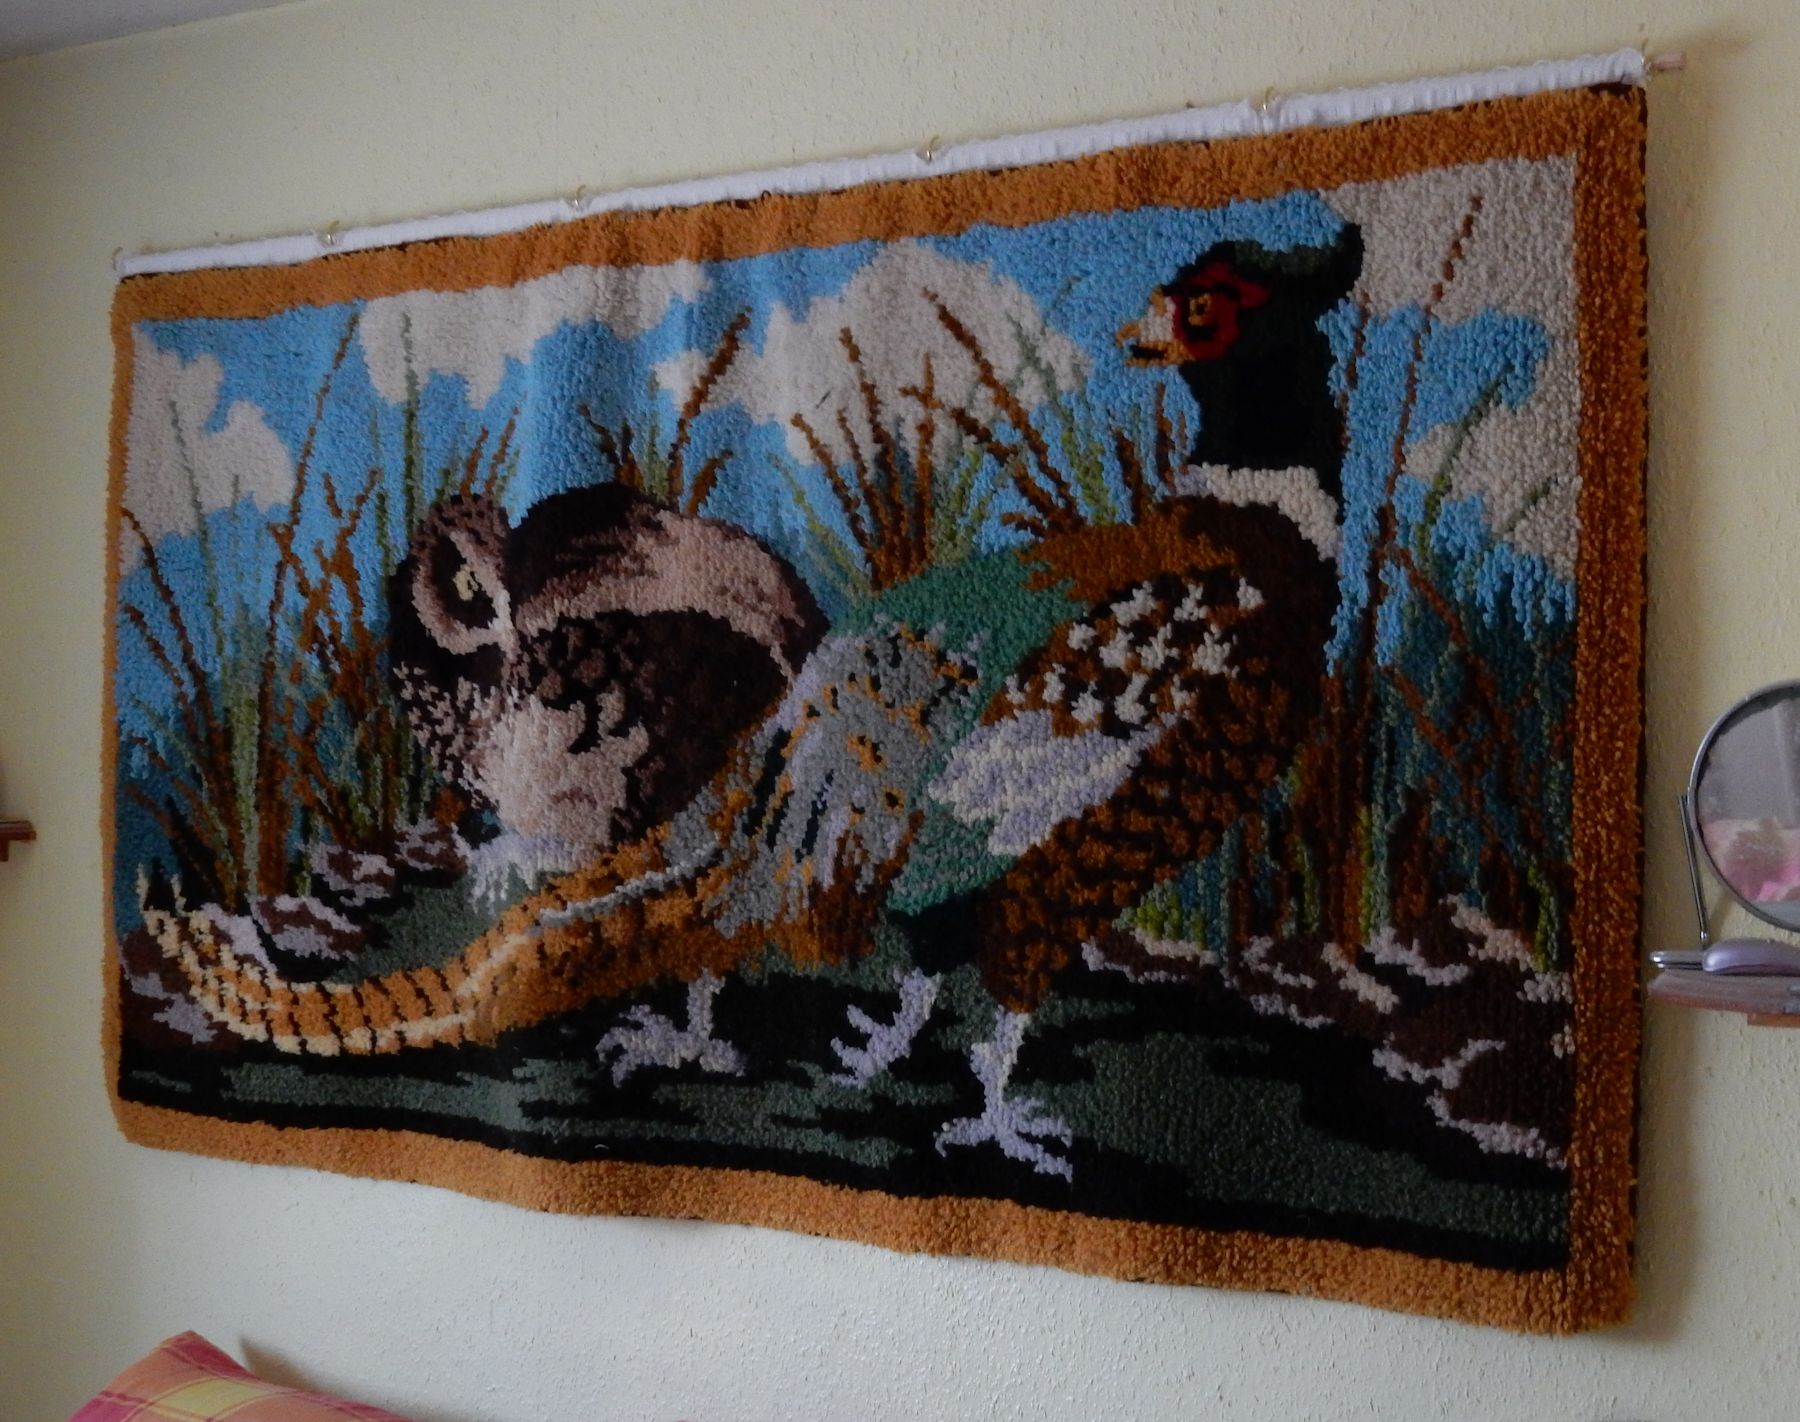
Pheasants hanging above the bed. This changes the brightness of the room because the wall was previously just yellow painted, but it makes me think of Tudor palaces with the luxury of hanging tapestries. This was surprisingly easy to hanging. It has 6 hanging points to take the weight. |
In some cases, it’s possible to give the impression of an intermediate shade by unpicking a 6-ply strand of yarn from each adjoining colour and making 2 new strands with a mix of each colour. This is effective when viewed from a distance. Unpicking strands is time-consuming and it’s simpler to just limit the number of colours on the design. (This is the only time when I find thin acrylic rug yarn useful – you need at least 4 strands to get a decent thickness for a tuft, and you mix strands easily).
There is software that converts photos into cross-stitch charts, but not into the limited colour ranges suitable for latch-hooking. A lot of downloadable charts claim they are also suitable for latch-hooking, but they are usually far too intricate in terms of pattern and hue for a pile rug. The end result will probably be disappointing. Before buying a tapestry/cross-stitch chart that is "also suitable for latch hooking" count the number of colours and look at the pattern. If the pattern is highly detailed or uses more than 12 shades then it’s unlikely to make a good rug pattern. If the pattern is simple and bold, then it’s worth a try. The difference between tapestry/needlepoint designs and rug designs is illustrated by these photos.
|
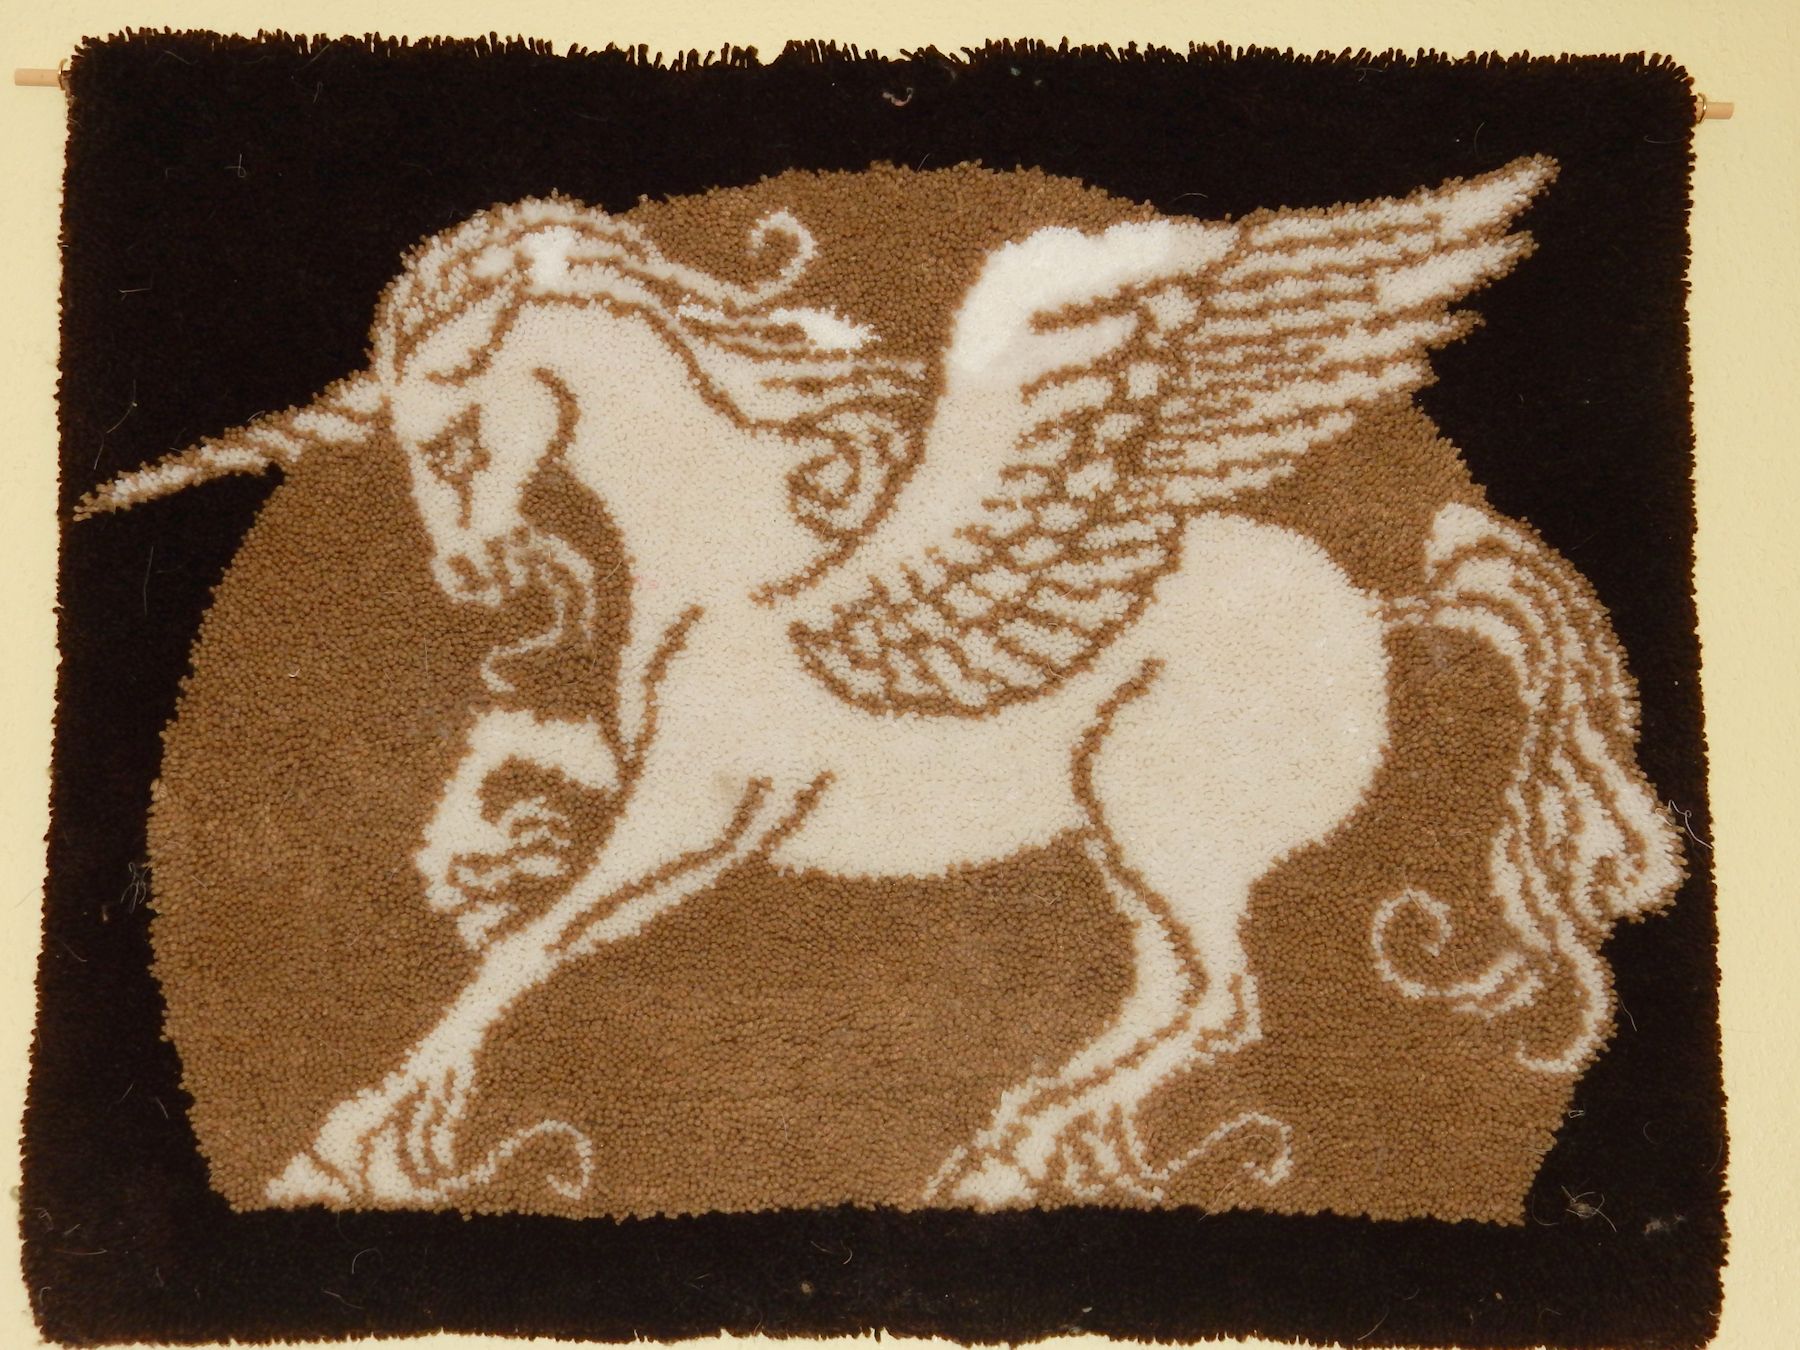
Unicorn hanging using the curtain-tape and pole method described below. |

You are visitor number: